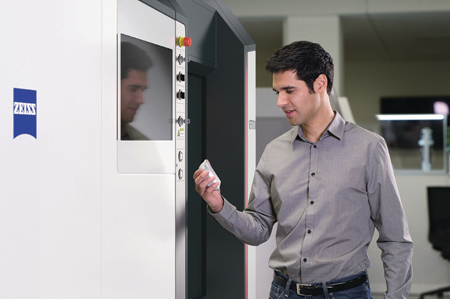
The ZEISS METROTOM 800 and 1500 CTs give users a quick look inside
ZEISS will introduce two computer tomographs (CTs) designed for speed and flexibility: the ZEISS METROTOM 800 with an extended performance spectrum and the new ZEISS METROTOM 1500.
"In light of the ongoing development of new materials and the growth in the manufacture of hybrid workpieces made from very different materials, it has become increasingly difficult to clearly separate the application fields of CTs," said Ralf Benninger, Head of Technical Sales and Product Management for CT at the ZEISS Industrial Metrology business group. "Thus companies need machines that can be used in as flexible a manner as possible - including larger and larger measuring ranges."
"Production processes are speeding up and inspection technology needs to keep pace," said a company spokesperson. "Consequently, industry requires increasingly fast and flexible machines. This is where the ZEISS METROTOM 800 and 1500 come into play."
Companies can choose between a ZEISS METROTOM 800 with a tube voltage of 225 kV and a version with a tube voltage of 130 kV. The increase in power from 39 to 500 watts on the ZEISS METROTOM 800 with 225 kV offers several advantages. Metal components along with mixed materials, e.g. hybrid workpieces, can be scanned without difficulty due to the enhanced performance. "This significantly expands the machine's application and ensures that the investment is future-proof," said Benninger. The optimized performance means that components are scanned faster than with the ZEISS METROTOM 800/130 kV.
Operators will also receive information about the entire component with the recently developed ZEISS METROTOM 1500/225 kV. "The innovation behind this machine will be of particular interest to manufacturers of die cast components," said Benninger. "Unlike the predecessor model, larger components can be scanned using this machine due to the new measuring Z-axis." The maximum height of the components used to be 300 mm. Now it is 700 mm. The larger operating volume is the result of two innovations. First, the workpiece can now be raised and lowered by 400 mm instead of 150 mm. Second, multiple scans can be merged into one volume model. Workpieces such as steering columns and other larger castings can now be tested noninvasively using the CT. This is an important requirement for shortening the time needed for initial sampling and accelerating process optimization during production ramp-ups.
The corresponding visualization and evaluation software delivers informative 3-D visualizations and section views based on the voxel data generated by ZEISS METROTOM OS. In addition to visualizations, the program also provides information on the shape, size and position of characteristics such as discontinuities and inclusions. Metrological evaluations can also be performed effectively using ZEISS CALYPSO software.
Even though both new machines have a complete enclosure to protect the operator from X-rays, the interior can be viewed by standing in front of the CT or at a different workstation. For this purpose, ZEISS has installed a camera and a monitor in every machine. The image from the camera can be displayed on the reconstruction computer to set up the measurement. When preparing the measurement at the workstation, the operator can make sure that there will not be a collision between the component and the detector or tube. The camera image can be viewed on different computers outside of the measuring lab. "By being able to check available machine capacity, operators can report and implement their measuring needs more quickly," said Benninger.
For more information contact:
Carl Zeiss Industrial Metrology, LLC
6250 Sycamore Lane N
Maple Grove, MN 55369
763-744-2400 / 800-327-9735
metrology@zeiss.com
www.zeiss.com/metrotom
IMTS 2016 Booth E-5502