

Centerless Cylindrical Grinding in Finishing Quality
June 1, 2014


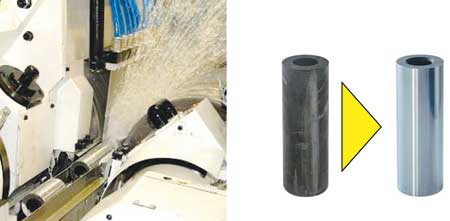
Grinding of piston pins. Workpieces are guided through the grinding process in seamless sequence and subsequently measured.
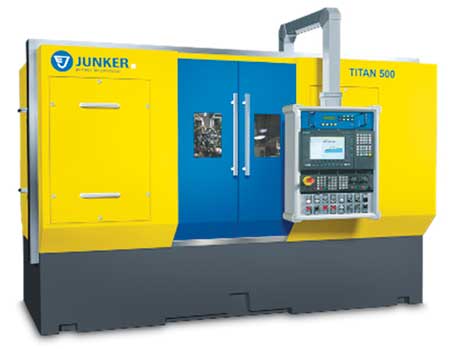
The Junker portfolio has been extended to include a new machine concept. The TITAN 500 is able to grind workpieces to a finished standard of quality using the throughfeed grinding technique. This entails workpieces passing through the machine in continuous sequence while they are precision ground by a wide CBN grinding wheel.
"To achieve this high standard of quality, the TITAN features a range of machine attachments such as wheelhead, regulating wheelhead, work blade and infeed/outfeed, which are aligned and calibrated to a high degree of precision," said a company spokesperson. "Another key factor is machine rigidity using a vibration damping, highly torsion-resistant cast mineral machine base designed specifically for CBN grinding."
Using the throughfeed process with a wide CBN grinding wheel, the workpieces pass in seamless sequence through the machine, provided all workpieces have only a single diameter requiring a uniform grinding operation. The axial force of the regulating wheel, which is generally inclined at an angle of 1.5 - 3.5°, pulls the flow of workpieces through the wheels towards the end of the grinding cell. Used in conjunction with an automated loading and unloading system, the workpieces pass through the machine without interruption.
Grinding example with the TITAN 500: centerless grinding of piston pin outside diameters in finishing quality. Qualities achieved (data may differ depending on the workpiece and the machining sequence):
- Diameter tolerance: < 0.005 mm
- Cylindrical shape: < 0.0012 mm
- Surface roughness Ra: 0.0001 mm
- Concentricity: < 0.001 mm
- Cycle time: 3.0 seconds
- Machine availability: > 95%
- Throughfeed rate: 2 m/min
- Grinding allowance: 0.3 mm.
Technical data:
- Grinding area: workpiece diameter 3-220 mm
- Grinding wheel: CBN 500 x 500 x 305 mm; spindle drive 37 (55-100) kW; abrasive, CBN
- Regulating wheel: regulating wheel dimensions 350 x 500 x 203 mm; spindle drive 11.5 kW
- Machine dimensions: 4,410 W x 2,600 L x 2,200 H mm; weight approx. 17,000 kg.
For more information contact:
Erwin Junker Machinery, Inc.
2541 Technology Drive, #410
Elgin, IL 60124
847-488-0406
info@junker-usa.com
www.junker-usa.com
< back