

CMM Aims to Set New Standards at NIST
May 1, 2017

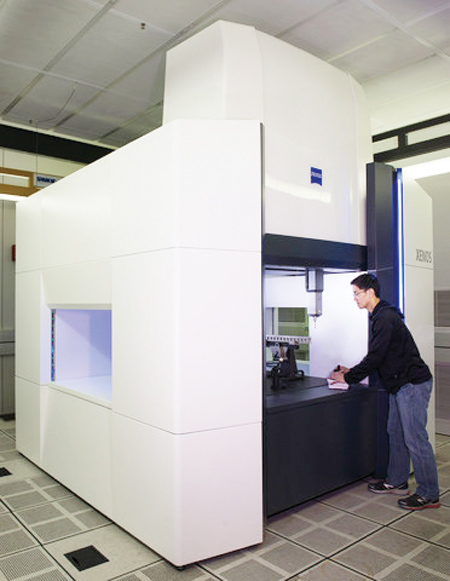
NIST's Vincent Lee with the new ZEISS XENOS CMM
The National Institute of Standards and Technology (NIST), the premier measurement standards laboratory for the U.S., has introduced a ZEISS XENOS coordinate measuring machine (CMM) to its Physical Measurement Laboratory (PML) to help scientists make a measurement of "big G," the universal constant of gravitation that has eluded precise measurement for centuries. The big G experiment will start this spring and should be complete within two years. "When that experiment is complete, however, the researchers hope to incorporate the instrument into their growing fleet of CMMs, which are capable of making some of the most precise dimensional measurements in the world," said a spokesperson.
"ZEISS is setting a new standard in precision with the XENOS measuring system, featuring a length measurement error of just 0.3 micrometers," said a Carl Zeiss spokesperson. "It also has a probe head that can move in all three dimensions, meaning that, unlike CMMs with a moving table, sensitive parts like those for the big G experiment are less likely to be disturbed during measurement." Customers who rely on NIST for this kind of measurement include manufacturers of ultra-precision parts, such as bearings for aircraft engines, test artifacts for other classes of measurement machines, and parts or structures for high-accuracy systems. Other customers come from the automotive and electronics industries, and from laboratories that perform calibrations for their own clientele.
"Existing measuring machine technology can be optimized only up to a certain level. Sooner or later, this potential is exhausted," said Konrad Werner, ZEISS XENOS Product Manager. "This machine is therefore an absolutely new development. ZEISS XENOS stands for very high accuracy and future-proofness due to the use of innovative technologies and materials. It offers a measuring area of just about one cubic meter. The engineers at ZEISS took a new approach in its development in order to set a new standard in precision with this measuring volume, while also increasing the measuring speed. Together, the weight reduction and constantly moving masses enable optimal coordination of the drives regarding acceleration and maximum speed."
For more information contact:
Carl Zeiss Industrial Metrology, LLC
6250 Sycamore Lane N
Maple Grove, MN 55369
763-744-2400 / 800-327-9735
metrology@zeiss.com
www.zeiss.com/xenos
< back