Inspection set-up: a) Robotic arm with SVS-Vistek camera and b) optical fiber sensor prototype with c) glass fiber system

Example of honeycomb cells segmentation (right) and honeycomb defects analysis (left)

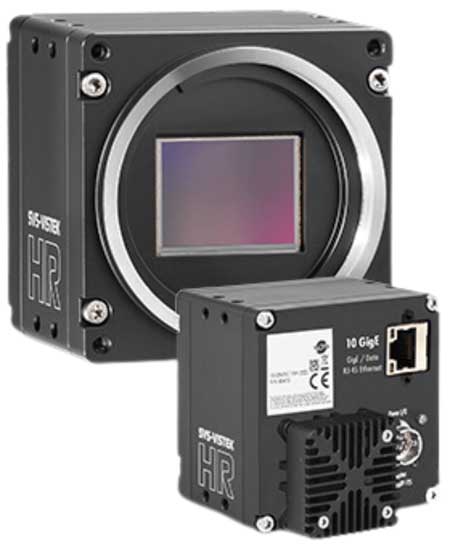
The SVS-Vistek HR hr455CXGE 10 GigE color camera features a 61 megapixel sensor with 9566 x 6380 resolution, rolling shutter, 3.76 µm pixel size and an 18 FPS frame rate
Manufacturers of aviation engine components are being impacted by Industry 4.0's emphasis on quality control. Industry 4.0 is challenging these manufacturers to rethink outdated QC processes and embrace new technologies.
"The small size and odd shapes of airplane engine components make them difficult to inspect," said an SVS-Vistek spokesperson. "Typically, they must undergo time-consuming manual inspection by trained QC operators. However, this cumbersome process is prone to human error and inefficiencies and has resulted in defects going undetected."
To assist in introducing Industry 4.0 concepts to component producers, a research team at the Polytechnic University of Turin, Italy, engineered an automated inspection system for commonly used honeycomb engine parts. Its two-phase nondestructive testing process is fully controlled by a Kuka self-mounted robot leveraging a 61-megapixel camera from SVS-Vistek, coupled with artificial intelligence (AI) algorithms for the detection of different types of defects.
Shortcomings of Manual Inspection
Honeycombs are critical to regulating engine compression. The name "honeycomb" comes from their structure, which consists of several hexagonal cells joined to one another. Honeycomb cells are subjected to intense heat phenomena during manufacture when they are attached to a support by a hot metal fluid, which may result in a variety of defects. Manual inspection is required to detect these defects, both externally and internally. Unfortunately, this can lead to errors due to subjective analysis, human tendencies, the working environment and characteristics of the specific part. Therefore, the successful detection of defects is highly influenced by the ability and experience of the human operator.
Benefits of Automated Inspection
The Polytechnic University of Turin researchers sought to develop a completely new approach that would automatize the inspection of the honeycomb parts, making it more objective and less prone to human errors. This system was developed within the context of the EIT Manufacturing AVISPA-2, a project focusing on automating visual inspection and processes for aero engines.
The system was built using the following components:
- Kuka KR16-2 robot with KRC4 robot controller
- Ingesys IC3 controller to activate the camera and glass fiber sensor
- SVS-Vistek hr455CXGE 61-megapixel 10GigE Vision color camera and K|Lens 3D lens to acquire images. The multiview stereo system allows the extraction of 3D information.
- Optical fiber sensor composed of 24 glass fibers and a microcontroller for data processing. This sensor goes inside the cells where the glass fibers are lighted in order to inspect neighboring cells.
- Disparity map software to provide depth information about each honeycomb cell
- Artificial Intelligence used to detect defects by means of automated segmentation techniques.
Two-Phase Testing Process
In the first phase of the testing, a robotic arm moves the SVS-Vistek camera directly above the honeycomb to acquire a frontal image at a resolution of 9,568 x 6,380 pixels at 18 frames per second. A multiview "kaleidoscopic" of the part is then created from nine images cut into individual sub-images, rectified and used to compute a disparity map for cell depth information. Next, the AI analyzes the images and detects external defects and cell coordinates. If defects are detected, the inspection ends and the part is rejected. Otherwise, phase two starts.
The second phase detects internal defects. Here, the robotic arm inserts the glass fiber sensor inside the cells of the honeycomb, scanning the whole part. Next, the AI takes the acquired honeycomb image and disparity map as input and creates a segmentation of the single cell profiles and the coordinates of their centers. The AI then inputs a set of quantitative features extracted from the segmentation results and identifies the faulty regions accordingly. This process is based on a combination of classic approaches-standard edge detectors, adaptive thresholding techniques-combined with deep learning architecture. AI analysis identifies superficial defects like damaged cells, missing cells and opened cells together with the coordinates of the center of each cell.
System Validation
To validate the automated system, the Polytechnic University of Turin researchers performed full demonstrations on multiple honeycomb parts within an aviation plant where it proved to be fast, accurate and robust. Unlike manual inspection, the system was completely repeatable, and the obtained results were traceable and documentable in every stage. All targeted defects, internal and external, that would result in part rejection were identified by the system with a high degree of precision. In addition, total inspection time was in the range of 40-60 seconds, which is very promising. Future works will focus on reducing the inspection time by at least 50%.
Authored by SVS-Vistek Inc.
For more information contact:
SVS-Vistek Inc.
4400 State Hwy. 121, Ste. 300
Lewisville, TX 75056
817-368-7635 / 800-935-6593
info-usa@svs-vistek.com
www.svs-vistek.com