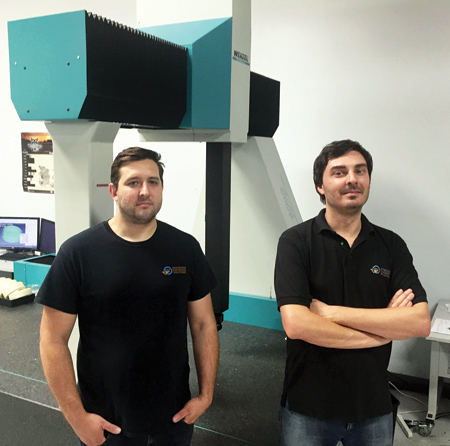
(l-r) EMS partners David Szabo and Balazs Ormai
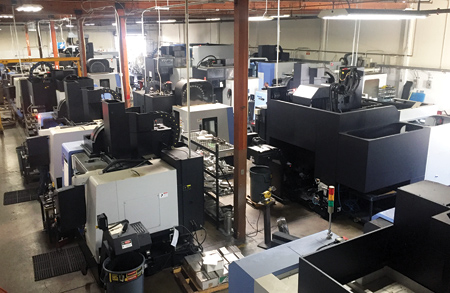
2: In just seven years, EMS has grown from a two-man shop with one machining center to a 20,000 sq. ft. shop with a team of 30 cross-trained machinists, manufacturing engineers and metrologists running three shifts.

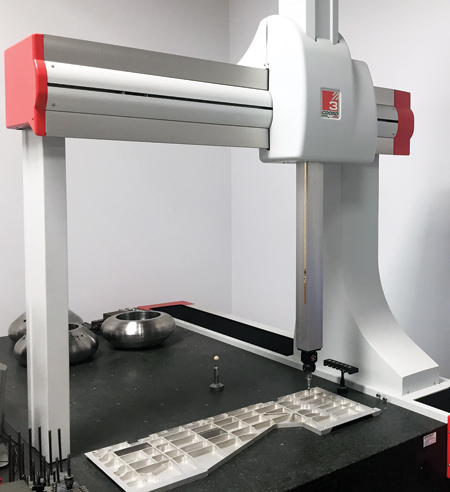
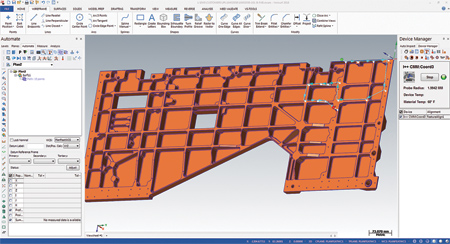
3: EMS uses Verisurf software to run three different CNC CMMs, each with different controllers, as well as trackers and arms, as part of its "consistency in metrology" strategy.
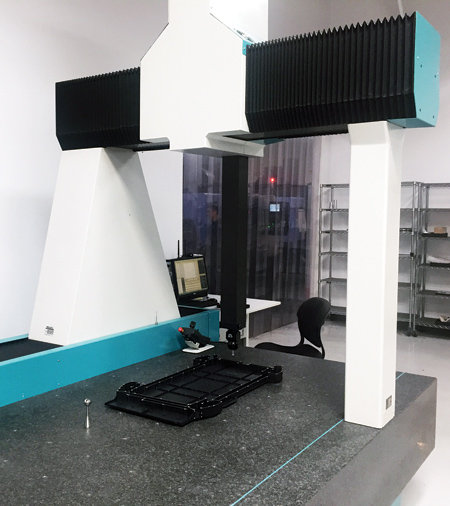
6 & 6a: Verisurf automatic part inspection running a legacy Wenzel CNC CMM.
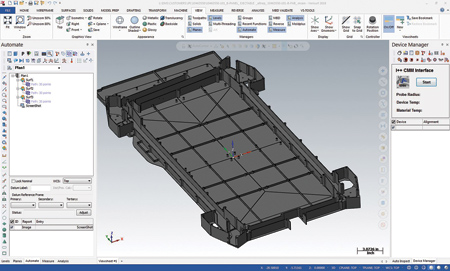
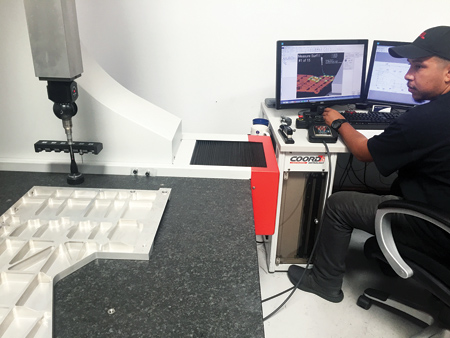
7, 7a & 7b: Verisurf automatic inspection routine being initiated on a Coord3 CNC CMM.
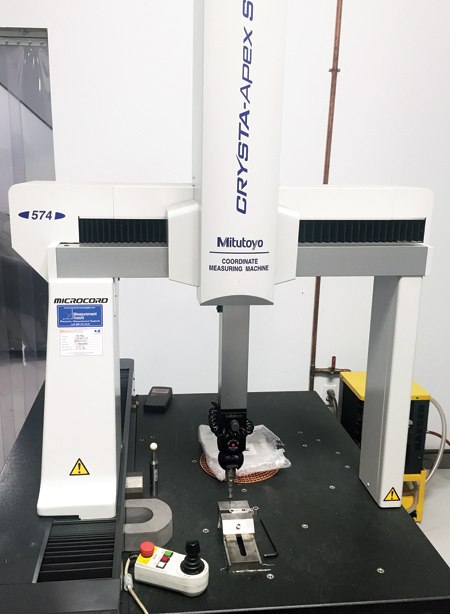
8: Legacy Mitutoyo CNC CMM being driven by Verisurf software.
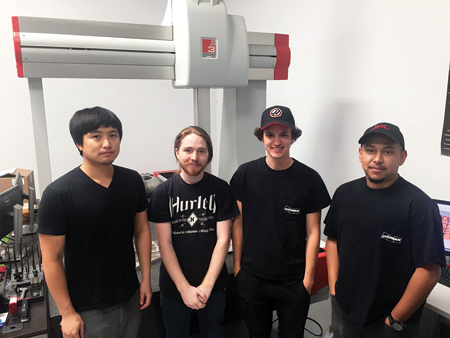
10: The quality team at EMS uses Verisurf software to run all digital measuring and inspection devices, whether in the quality lab or on the shop floor. (l-r) Brian, Isaac, Tyler and Eddie, Lead Inspector.
Consistency tells a lot about a company-who they are, what they are good at and what they stand for. Job shops in today's highly competitive manufacturing industry need to stand for something customers can relate to, whether that is great quality, low price, fast turnaround or a myriad of other attributes. Customers need to know they will receive a consistent deliverable, based on their own profile of a company's capabilities.
From humble beginnings in 2011, Engineered Machining Solutions (EMS) founders Balazs Ormai and David Szabo envisioned a manufacturing company that could consistently produce complex high-quality, close tolerance machined parts for the aerospace industry. The pair shared a passion for solving problems through teamwork, a culture that continues to drive the company today.
"We have developed a strong sense of teamwork here. There is no room for big egos. Everybody pulls together, and at the end of the day we turn out great parts," said Szabo.
In just seven years, EMS has grown from a two-man shop with one machining center to a 20,000 sq. ft. shop with a team of 30 cross-trained machinists, manufacturing engineers and metrologists running three shifts. "Throughout our growth we have never stopped challenging ourselves. We are constantly looking at process improvement and quality to see how we can be more efficient and continue to raise the bar on turnaround and customer satisfaction. There are five key points to our overall success, but they all include #1: consistency," said Ormai.
EMS' five key points are: 1) consistency, 2) quality, 3) teamwork, 4) speed and 5) efficiency.
Consistency is what validates commitment and competency in each of EMS' five elements of customer satisfaction and overall success, so it is easy to see why the company placed an emphasis on this attribute when planning for and evaluating automated inspection solutions. Solution requirements included:
- Consistent measurement software platform
- Consistent hardware device interface and operation
- Consistent database
- Consistent processes
- Consistent training and support.
Consistent Quality Inspection and Reporting
Quality verification and reporting is extremely important to EMS' customers, with most jobs requiring 100% inspection. As EMS grew, the inspection lab became a bottleneck and needed to be rethought. Like every other initiative EMS engages in, they first looked to their team, workflow, current technologies in place and software being utilized in the quality lab and throughout the shop.
EMS had two legacy CNC CMMs in place, a Mitutoyo CMM and Wenzel CMM, both operated by different controllers and running unique software. This caused inefficiency in the quality lab and added to training and support costs.
Following a full assessment, the team came up with the following criteria for an enterprise wide inspection and reporting solution:
- If possible, a single measurement application software must drive all metrology processes for the company.
- Software must be model-based on a CAD platform to allow flexibility in managing files and easily accessing datums within the design authority.
- Measurement software must import and export all CAD files and models seamlessly.
- Software must be able to import and allow annotation of intelligent GD&T data.
- Solution must be capable of interfacing with and controlling all existing and future measurement hardware devices.
- Software must have the flexibility and embedded tools to handle the range of inspection data, from manual contact probing to non-contact point clouds.
Providing Digital Consistency
Verisurf Software was selected to support EMS' quality inspection and reporting objectives based on its open CAD-based architecture and model-based capabilities. "Many software programs and hardware measuring device manufacturers want to lock customers in to their platform," said a Verisurf spokesperson. "Contrary to this approach, Verisurf software serves as a common platform and communicates openly with all CAD software and all metrology devices, across the manufacturing enterprise. This includes portable and fixed measuring devices as well as new and legacy equipment."
Universal CMM Solution
Case in point, EMS' Mitutoyo and Wenzel legacy CMMs did not support the open I++ protocol to facilitate integration. Verisurf Universal CMM software was able to provide an open standard communication protocol, allowing EMS to continue using the legacy CMMs while gaining the consistency of interface, operation and reporting with Verisurf. By incorporating the Verisurf CAD-based metrology platform across their manufacturing enterprise, EMS gained the flexibility to choose the right measuring device for each job, while realizing increased efficiency and reduced training, data management and support costs.
"Verisurf is our quality inspection and reporting platform. We use it to control all of our measurement devices and process measurement data, and use it to generate custom reports," said Szabo.
Supporting Metrology Growth at EMS
Since EMS implemented the software solution, a Coord3 CMM, which uses the open standard I++ protocol, has been added along with two Faro portable CMMs, a Faro scanner and laser tracker. This has further improved capacity in the quality lab and allowed for in-process inspection on the shop floor. "Integrating new hardware into our measurement toolset is easy. The team is already familiar with the interface and can be quickly trained on any nuances associated with an added device," said Szabo.
The addition of a laser tracker has allowed EMS to inspect larger parts, support assembly guidance and aid in toolmaking jobs undertaken by the company. Verisurf Software supports each of these applications, along with reverse engineering to determine "best fit" scenarios, capture missing features or complex surface profiles directly to CAD and much more.
"Now that we have a solid metrology strategy in place, creativity and innovation is showing itself in the process. Our metrology capabilities are an arsenal of problem solving tools," said Ormai.
For EMS, inspection and reporting used to be isolated in the quality lab. Today, it is much more integrated with the production floor through in-process inspection using Verisurf open CAD-based measurement software. Model-based inspection has helped close the digital loop; it feeds back to the CAD data authority, making inspection results more valuable and easier to attain, and eliminates interpretation and ambiguity concerning the design intent. Standardizing on Verisurf inspection software across the manufacturing enterprise has provided consistency of operation, quality reporting, data management, and reduced training and support costs.
For more information contact:
Engineered Machining Solutions
200 W. Grove Ave.
Orange, CA 92865
714-288-0608
info@ems-mfg.com
www.ems-mfg.com
Verisurf Software, Inc.
4907 E. Landon Dr.
Anaheim, CA 92807
888-713-7201 / 714-970-1683
info@verisurf.com
www.verisurf.com