Hommel Etamic Roundscan

Probe to measure roundness, surface finish and lead angle

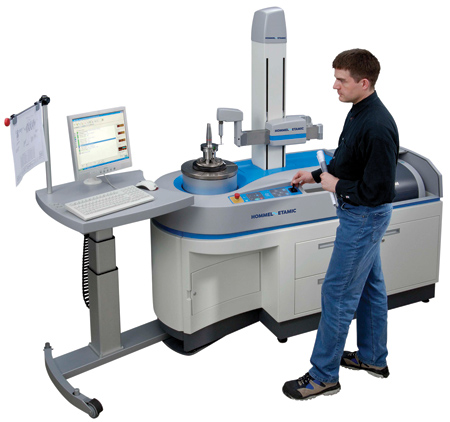
"Roundness testers, surface analyzers and lead angle detection inspection benches-instrumentation to measure roundness, cylindricity, surface finish and lead angle shaft seals-have all existed separately for a long time," said a Jenoptik spokesperson. "The Hommel-Etamic Roundscan system incorporates all these measurements into one robust automated inspection system for metrology lab and shop floor production applications."
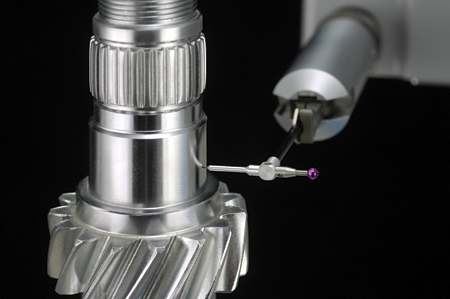
After measuring the roundness and cylindricity on the journals using sapphire ball tip, the equipment will automatically index the diamond tip and measure the surface finish on both the diameter of the journal and on the face of the gear and finally lead angle on the journal.
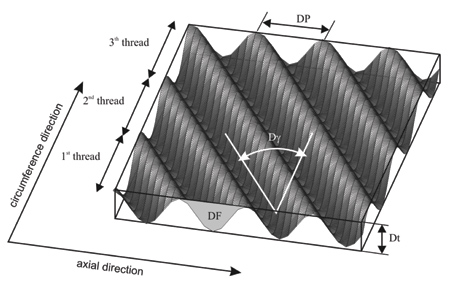
"Lead angle is a periodical structure, both axially and circumferentially," said the spokesperson. "Characterizing axial structure roughness requires the use of high-resolution measurement systems. Circumferential structure roughness can be characterized using significantly coarser systems because the frequency of the lead angle typically lies between a range of 0 and 180 waves per 360° rotation. This makes it acceptable to measure lead angle using a defined number of parallel roughness traces in an axial direction. Part clamping of the workpiece can have an influence on this type of measurement, which can be eliminated using special hardware or mathematical algorithms."
The spokesperson continued, "Lead angle issues exist in both turning and grinding operations, inevitably due to machine feed motions leading to a single thread-like surface structure who's lead-gradient is determined by the rotary feed. During dressing of the grinding wheel, the dressing in-feed rate can create a helix on the surface of the grinding disc, which is then transferred to the workpiece surface during actual grinding (this is subject to a ratio of the rotational velocities). This necessitates using the entire circumference of the workpiece in order to determine the lead angle structure (twist measurement). Since these helix-like structures (lead angle) caused by the manufacturing process can lead to an unacceptable amount of lubricant consumption, and possible failure of the entire assembly, it becomes even more critical to develop standardized methods by which the lead angle of these parts can be truly measured."
Measurement of the lead angle on a shaft seal is a complex and time-consuming process that either uses expensive microscopes to measure the lead angle or uses stand-alone test stand to perform string tests. The HE Roundscan can also measure and calculate lead angle of the seal surface.
Hommel-Etamic, being one of the co-developers of both the earlier first generation and the newer second-generation standard (MBN 31007-07), has developed two measurement techniques designed to deliver the best measurement results possible. Twist and TwistLive have been optimized to perform actual lead angle measurement on parts manufactured during grinding or turning. Twist lead angle measurement consists of taking 72 separate roughness traces, 5° apart, each trace exactly 2 mm long with a sampling distance of 0.5 µm. This measuring process allows the actual measurement of lead angle (Dy), lead pitch (DP) and lead depth (Dt) along the entire circumference of the part. This is a time intensive process that allows not only actual measurement of each the parameters, but also allows the calculation of the volumetric area of the total surface area. TwistLive lead angle measurement considerably shortens the measurement time frame by only taking about 10 separate roughness traces, each trace exactly 2 mm long with a sampling distance of 0.5um and then extrapolating (predicting) the lead angle between each trace. This feature reduces the lead angle measurement time to 2 min. from about 30 min.
For true lead angle measurement of dynamic sealing surfaces, Twist and TwistLive measurement enables the manufacturing industry to better control and possibly eliminate fluid leakage at dynamically stressed points.
Programming is quick and simple on the Hommel-Etamic EVOVIS evaluation software and incorporates automatic identification of the part type. The EVOVIS software employs sophisticated technology and safety features for collision avoidance. Evaluated measurement results can be output for further processing of inspected parameters.
For more information contact:
Jenoptik Industrial Metrology
1500 West Hamlin Rd.
Rochester Hills, MI 48309
248-853-5888
automotive.info@jenoptik.us
www.jenoptik.us
Hommel-Etamic
www.hommel-etamic.com