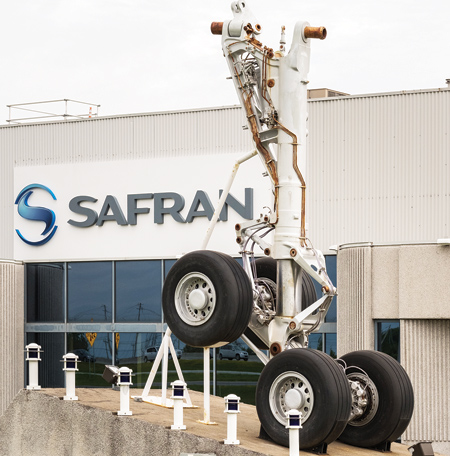
Safran Landing Systems' Mirabel plant was expanded several years ago to be able to handle very large landing system orders from Airbus and Boeing.
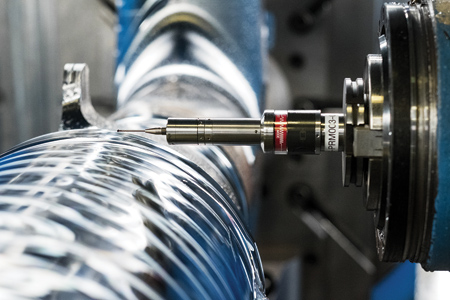
The surface roughness gauge TC63-RG from BLUM quickly and reliably detects the surface roughness of landing gear components.
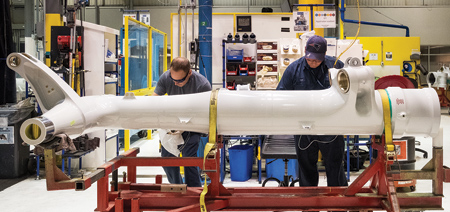
At its plant in Mirabel, Canada, the company builds landing systems for commercial airliners from Airbus and Boeing.
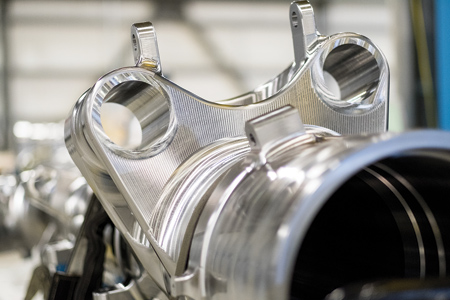
The components are first prepared using rough cutters and then machined in a finishing process that gives the parts their final dimensions. The last step is to check the surface quality.
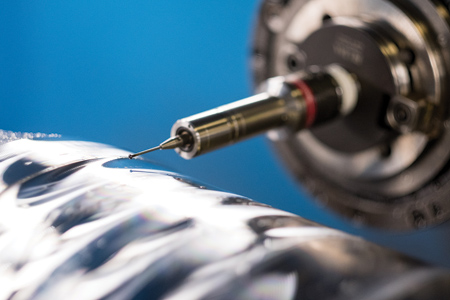
The TC63-RG is supplied with a special stylus. "Unlike the manual measuring devices, measuring movements are possible along two axes, which is useful for measuring rounded shapes," said a Blum-Novotest spokesperson.

The main component of each landing system is a massive forged piece that can weigh up to eight tons. Despite the cooling agent in the working area, the surface roughness gauge TC63-RG delivers reliable results.
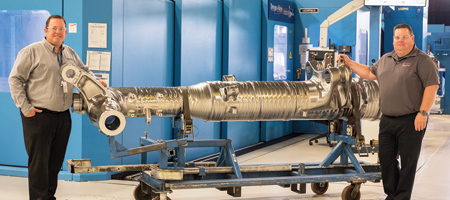
(l-r) Shawn Page, Safran's NC Coordinator, and Jamie King, Regional Sales Manager of Blum-Novotest in Canada, next to a fully machined landing system part.
Safran Landing Systems is a large manufacturer of aircraft landing systems. At its plant in Mirabel, just north of Montreal, Quebec, the company builds landing gear for Airbus and Boeing commercial airliners-the mainstays of the global aviation industry. Every day Safran's products get hundreds of commercial airline flights into the air and bring them safely to their destinations.
The aerospace sector is a technically demanding field, and Safran aims to meet whatever challenge its customers present. One of the ways it does that is in the use of advanced technology solutions to support manufacturing and data gathering. The company has an entire department dedicated to Industry 4.0 that works constantly to improve how the company collects and uses the massive amounts of data generated during manufacturing. The company also spends about 7% of its revenue on research and development.
To ensure that every assembly that leaves its plant meets stringent customer requirements, Safran has been using Blum-Novotest measuring equipment for years. The company first used Blum lasers to measure and check tools, monitoring length, radius, diameter and other parameters to prevent crashes and track tool wear. The company has also relied on the Blum TC63 CNC touch probe to enhance the precision of workpiece measurement for several years now. More recently, Safran deployed Blum's TC64-RG roughness gauge to monitor surface finish-an especially critical parameter in the highly engineered systems it manufactures.
Safran manufactures the main component of the landing gear in Mirabel, north of Montreal. Overseeing the manufacturing process is NC Coordinator Shawn Page. "It is a machining-intensive process, and our customers are very demanding when it comes to precision," Page said, when describing their process for building these landing gear components. "Surface finish is critical."
A couple of years ago, the Safran plant in Mirabel was expanded to handle massive new landing gear contracts from Airbus and Boeing. Growth is good-but as any business owner knows, it can also be a big challenge. In addition to expanding its plant, Safran needed to ramp up capacity quickly while maintaining the highest standards of accuracy and repeatability by introducing more automation into its parts inspection process.
The primary component of each landing gear system starts out as a massive forging, some of them weighing up to eight tons. Each forging is mounted on a CNC machining center that uses heavy cutters to rough in the shape, imparting a rough finish that brings the workpiece close enough to final configuration that only a thin layer of metal needs to be removed to achieve final finish. A second pass removes that layer, bringing the workpiece to the required final finish. The Blum TC64-RG roughness gauge is then used to conduct a detailed surface inspection of the finished part. Any irregularities detected at this stage will be minor enough that they can be removed by a final polishing process.
Safran needed to increase automation to handle increased workload, reduce manual processes and maintain and improve its high standards of quality control. Surface finish inspection was one area where Page needed to cut time out of the process, improve accuracy and increase the number of workpiece surfaces under inspection-all with fewer operators available. He also wanted to increase the amount of data gathered during production and have the ability to feed that data back into the production process.
Because surface inspection took place with the finished part still mounted on the machining center, the process cut into the machine's cycle time, in addition to operator time. There were 10 areas on each part that needed to be inspected. The process took around 45 minutes, and because the accuracy of measurement depended on the operator placing the handheld measuring device correctly, the possibility of human error had to be considered. The amount of time required also meant Page was forced to inspect a limited number of surfaces.
When Jamie King, Canadian Regional Manager for Blum-Novotest, introduced the TC64-RG roughness gauge to Page and his team, they were intrigued by its potential to optimize their surface inspection process. "It had the right potential for us," Page said, "and we wanted to look into it in more detail." After several on-site demonstrations at Safran's Mirabel plant, King arranged a visit for Page to tour Blum's headquarters in Ravensburg, Germany, to get a closer look. After witnessing the possibilities of the roughness gauge first-hand, the decision to move forward was an easy one.
Blum always works closely with its customers to tailor its solutions precisely to their needs, and King took an active role as a resource for Safran throughout the implementation of the TC64-RG. This process included iterative development of custom software to integrate the parts measurement process with Safran's back-end IT systems. With special funding from their parent company, The Safran Group, to develop the system, Page and his team worked closely with Blum to develop the solution. As King noted, "It was very much a partnership to get where we are today."
Page reported that with the help of the TC64-RG roughness gauge, he hopes to eliminate the possibility of human error in the measuring process. He anticipates the roughness gauge will also reduce the amount of time required for inspection. Page explains he will utilize any time savings by doing an even more robust parts check, inspecting many more surfaces than was possible before. And it will now be possible to check every tool at the beginning and end of each machining pass so that wear and deviation can be spotted and corrected well before they become a serious problem. In the future, Page plans to migrate this solution to other machines and processes at Safran.
For more information contact:
Blum-Novotest, Inc.
4144 Olympic Blvd.
Erlanger, KY 41018
859-344-6789
info@blum-novotest.us
www.blum-novotest.com/us
Safran Landing Systems
www.safran-landing-systems.com