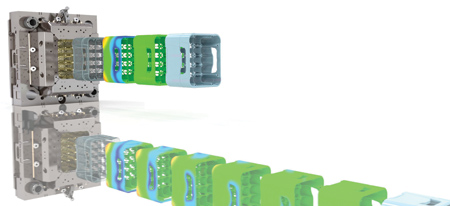
Achieve enhanced molds in half the time with Zeiss Reverse Engineering.
"Zeiss Reverse Engineering (ZRE) software offers a new and innovative option to significantly improve the tool correction process. Time-consuming iterations are replaced with actual measured values and enhanced algorithmic methods to reduce process time by over 50%," said a Zeiss spokesperson. ZRE guides users through this software process step by step. To simplify the solution further, customers can source both the data collection hardware and software from ZEISS for a complete, integrated reverse engineering solution.
ZRE is designed to make tool correction more efficient because it reduces time-consuming work. Typically, tool manufacturers rely on simulation software and experienced tool and die makers to design and produce molds for plastics, stamping, die casting and forging industries. Multiple iterations of corrections to the tool are usually required before a finished part is accepted. Each iteration is both time consuming and costly. With ZRE, tool and die makers use actual measured values from the first test pieces and algorithmic methods for tool corrections.
"ZRE shortens tool correction iterations substantially: first, high-precision actual data is captured from the initial test components," said a company spokesperson. ZRE then compares the point cloud or mesh to the part CAD model. A nominal/actual analysis is performed to show part deviation and areas out of tolerance. To correct the areas of concern, the software guides the user to invert the deviated points and transforms them to the CAD surfaces of the mold model. Finally, a new surface is created with the corrected points using reverse engineering and the surface refitted to the original mold CAD model. Using this new model, modifications are made to the tool and another test piece is made. "This method may be repeated, but success stories have shown that the number of necessary iterations is reduced by more than half," said the spokesperson. "Simulation software and experienced tool and die makers are still valuable assets in tool design, and ZRE extends tool manufacturers the ability to save money and bring products to the market faster."
ZRE also offers the traditional tools of reverse engineering to build CAD models from finished parts using powerful surface reconstruction functions. Added value is provided with evaluation tools to ensure the model is created within expected accuracy parameters.
For the ZEISS solution, users can generate scanned data of a test piece from multiple sources, including computer tomography, optical sensors or a coordinate measuring machine (CMM).
For more information contact:
Carl Zeiss Industrial Metrology, LLC
6250 Sycamore Lane N
Maple Grove, MN 55369
763-744-2400 / 800-327-9735
info.metrology.us@zeiss.com
www.zeiss.com/metrology