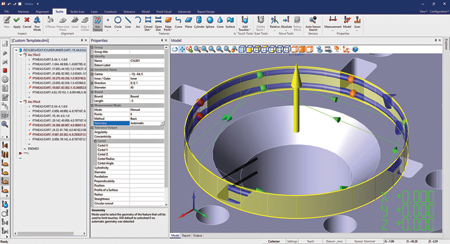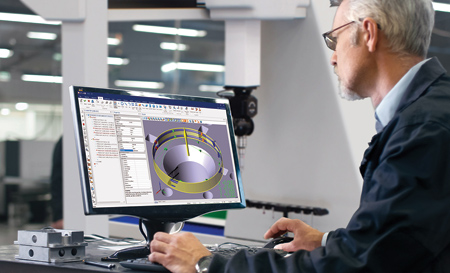
A CAMIO 2021 screen shot.

LK Metrology offers CAMIO 2021, its CMM software for measurement, programming, analysis and reporting.
LK Metrology offers the latest version of its measurement, programming, analysis and reporting CMM software. Now called CAMIO 2021, the software has been improved in numerous key areas to help increase inspection productivity, improve the quality of data collected and gain better insight into the components being measured.
CAMIO 2021 Geometry Validation reduces the time taken when preparing new inspection programs by automatically detecting which surfaces of the CAD model should be used to measure the feature. It ensures that all measurements are taken on suitable surfaces automatically, and at the same time provides the programmer with the option to modify the default settings and selections.
While the feature is being programmed, the CAD simulation highlights the geometry used for the validation and previews the measurement sequence. This combines with the Teach Path view to provide a full visual and numerical evaluation of the programming sequence prior to executing the touch points or scanning sequence, enabling the programmer to get the inspection sequence right first time when programming online or offline. Other improvements have been made to the programming workflow by extending the advanced picking function to touch points and scan paths on a CAD model and to indicate the selection of existing measured features.
New for CAMIO 2021, probe self-centering allows the center point of a V-groove to be automatically located and measured using a scanning probe. This replicates hard gauging and measurement using gauge-balls, typically used for gear tooth inspection and measuring countersink depth. Probe self-centering responds to the continuous deflections of an analogue probe in real time to locate the mid-point between two surfaces.
CAMIO 2021 Orientation Tolerancing automatically determines the appropriate relationship to a secondary datum based on the nominal feature definitions. Any manually specified relationship is ignored, except in cases where a relationship cannot be determined automatically. Tolerance zone shape and relationship to the secondary datum outputs have been added for enhancing the output of orientation tolerances. Perpendicularity, parallelism and angularity checking have been enhanced with improved validation, evaluation and user feedback for geometric dimensioning and tolerancing (GD&T).
For CAD users, the CAMIO 2021 exchange file versions have been updated to the latest release of Spatial's InterOp. The interoperability software for CAD data translation allows users to import, interact with, share and export 3D data easily across CMM platforms and manufacturing sites. The Select Components dialogue box has been extended to reserve stalls in the ACR3 change rack for any CMM laser scanner, including all those from Nikon Metrology. Lastly, the NMAPI interface that enables deployment of Nikon Metrology laser scanners on a CMM has been updated to version 4.6.
CAMIO 2021 recommends novice and experienced users to drive the inspection process graphically from the CAD model, either online or offline, although teach and learn using the CMM handbox is available. An advanced user interface makes part alignment, feature inspection and dimensional tolerancing fast and intuitive. The virtual CMM programming environment allows accurate axis movement and probe motion sequences to be simulated for collision detection and cycle time estimations. Help Files now use a version of HTML5 help that supports modern internet browsers, such as Microsoft Edge and Google Chrome, and link to locally installed help pages.
CAMIO 2021 supports Metrology Gate, Industry 4.0 software that enables production teams to remotely view and analyze quality data and monitor all CMM activity from any internet-connected device. The web-based portal provides 24/7 access to information from any enabled metrology device for automatically retrieving inspection results and a summary of errors, a record of program changes, uptime of the CMMs and overall equipment effectiveness (OEE). Historical logs assist with troubleshooting and warn when routine maintenance is due, not only of the inspection machines, but also of the machine tools or other equipment on which the components are being made. The software also provides a modular solution for various levels of CMM automation to raise productivity, cost effectiveness and product quality.
For more information contact:
LK Metrology, Inc.
29550 W.K. Smith Drive, Unit B
New Hudson, MI 48165
810-263-6100
sales.us@lkmetrology.com
www.lkmetrology.com