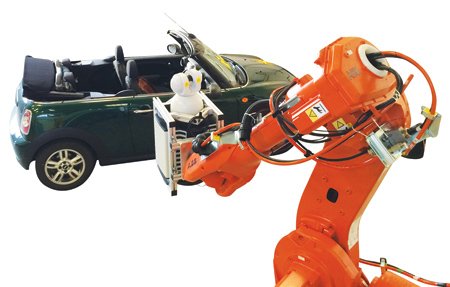
Nikon's Laser Radar combines laser-based data acquisition with robotic automation.

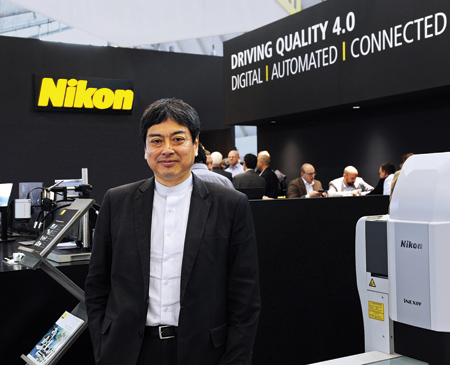
Nikon Corporate Vice President Tadashi Nakayama.
"Industry 4.0, the Fourth Industrial Revolution, heralds the complete digitalization of design and manufacturing, from CAD/CAM software for component design through computer-controlled machining and logistics, often employing cloud computing and the industrial internet of things (IIoT)."
"In response, the core elements of a Quality 4.0-based process require measuring key component features automatically as close to real-time as possible. It also includes acquiring digital results and feeding them back directly to machinery to control production automatically. In this way, the quality function drives the manufacturing process, guaranteeing the best-possible products."
Digital, Automated and Connected Inspection Driving Quality 4.0
According to Nikon Vice President Tadashi Nakayama, Nikon Metrology is committed to ensuring its measuring systems lead the field in Industry 4.0, interconnecting inspection and production. The goal is to enable manufacturers to produce better products at lower cost, speed up their response to changes in demand, shorten time-to-market and achieve greater competitiveness.
"The quality function must take the lead and be the driver of the manufacturing process," Nakayama observed. "Measurement should no longer simply be an arbiter of pass or fail, but a means of continuously monitoring and adjusting the process to ensure every component passes. When such a policy is adopted, downtime, scrap and costly reworking of parts become a thing of the past."
The challenge with Quality 4.0 technology is to collect measured results in as near real-time as possible, hence the desirability of automation to speed up the rate at which data is recorded. Additionally, automated evaluation minimizes the risk of human error when interpreting results.
Artificial intelligence software is then employed to analyze the large amounts of information and correlate the QC data with the CAD model of the component and the machine data. In this way, it is possible to arrive at an understanding of where and why a drift is occurring so that it can be continuously corrected. Earlier and much better insight into production performance is the result, allowing 100% component accuracy, repeatability, reproducibility and traceability.
Nikon Metrology has already supplied Industry 4.0-enabled QC systems to customers in Europe, Asia and the U.S. One example in the German automotive industry involves rapid, automatic measurement of the position of studs on the underbody of cars in a production line to an accuracy of 100 microns using multiple laser radar systems. Feedback to the stud-welding robots to adjust the process is currently manual, but plans are already in place to close the loop in the near future and automate this part of the procedure as well.
Within the automotive supply chain, electrical connectors are big business, there being an average of 2,000 in every vehicle. One such manufacturer, which makes six billion plastic injection-molded connectors per year, has adopted a policy of zero-defect production. It recognizes that a faulty part can be an annoyance to a driver, possibly leading to costly warranty repairs or a recall by the OEM, or at worst fatal if the connector is part of the vehicle's automatic braking system. For this application, Nikon Metrology supplied a turn-key, shop floor inspection system with handling equipment and software that automatically loads samples into a computed tomography (CT) scanner. If a housing is out of tolerance, it is rejected and an alarm sent to the operator who stops and adjusts the relevant machine immediately to avoid production of scrap.
Future Focus
Nikon Metrology's strategy over the next few years will be twofold. First, from a technical perspective, collection of digital measurement data will be paramount to enable intelligent process control systems, whether local or in the cloud.
The company's core competencies being brought to bear in this area, according to Nakayama, are laser scanning; X-ray including CT, especially suitable for high-speed, non-destructive inspection of the interiors of additively manufactured parts; analysis and control software; and the high-quality optics of its parent group. Add precision mechanics, such as the drives on the company's video measuring machines and large-scale laser radar scanners.
Secondly, Nikon is increasing the focus on building even stronger relationships with customers. "Few in manufacturing will have missed the trend away from a supplier simply delivering a machine and leaving the user to get on with it, although amazingly it still happens. A solution approach is essential these days and Nikon Metrology is strengthening its offering by entering into long-term business relationships with its global customers, providing support before, during and long after installation of a new process," said a company spokesperson.
For more information contact:
Nikon Metrology, Inc.
12701 Grand River Rd.
Brighton, MI 48116
810-220-4360
sales.nm-us@nikon.com
www.nikonmetrology.com