

New Visualization and Evaluation Software: LC-VISION
February 1, 2021

Now, for the first time LC-VISION, specially developed for BLUM's laser measuring systems, enables live visualization and analysis of the values recorded during the measuring process directly on the machine control.

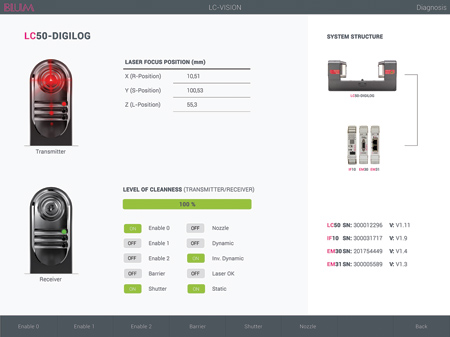
All relevant system information, along with functions for preventive maintenance, is available in the diagnostics view.
"The LC50-DIGILOG laser measuring system, introduced by BLUM in 2017, led the way in creating a whole range of highly innovative products utilizing DIGILOG technology," said a company spokesperson. "DIGILOG workpiece and tool measuring systems enable faster measurements by recording thousands of measured values a second and offering maximum process reliability through data stream evaluation. In addition to the latest hardware, LC-VISION is the new visualization and evaluation software included in the BLUM family of DIGILOG products. The software, specially developed for BLUM's laser measuring systems, takes tool measurement in the machine to the next level. For the first time, it enables live visualization and analysis of the values recorded during the measuring process directly on the machine's control."
LC-VISION is used in combination with new applications such as SpindleControl. With the help of SpindleControl, DIGILOG laser measuring systems can record the condition of the spindle at different speeds and indicate at a very early stage any bearing damage that may result in machining inaccuracies. This data can also be used for preventive maintenance, thereby ensuring that a spindle can be overhauled before total failure and unscheduled machine downtime. The function can also be used to minimize the warm-up times of machines in high-precision machining. By using SpindleControl, the user can determine when the machine has reached a thermally stable state and machining can commence. Even vibration analysis based on spindle RPM/range is possible. For example, the data can be used to identify irregularities that indicate bearing damage.
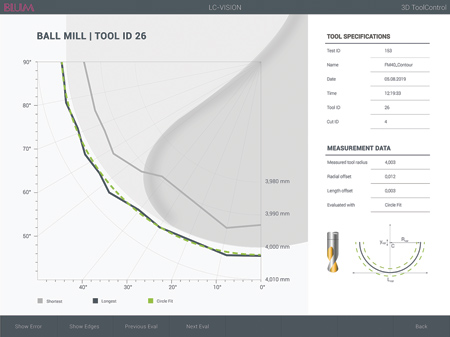
Another application called 3D ToolControl can be used to provide a detailed representation of wear and defects on the tool's cutting edges. The longest and shortest cutting edge at various pressure angles can be visualized at a glance utilizing this software. This allows the user to see at which angular position a problem exists. LC-VISION and 3D ToolControl also provides a view in which the measured length values of each individual cutting edge are displayed in a bar chart. Based on this visualization it is possible to draw conclusions about the achievable surface quality, the quality of the (new) tools used and their service life. Another special feature of LC-VISION is the diagnostics view: for the first time, all relevant system information, such as focus position, installed hardware and software as well as preventive maintenance data, are displayed to the operator on the control screen.
For more information contact:
Blum-Novotest, Inc.
4144 Olympic Blvd.
Erlanger, KY 41018
859-344-6789
info@blum-novotest.us
www.blum-novotest.com/us
www.blum-novotest.com/us
< back