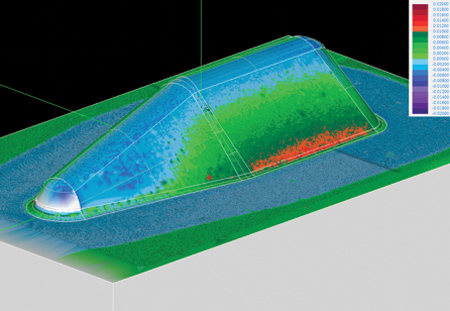
Color-coded comparison of plug contact vs. CAD data (about 1.5 mm x 3 mm)
Due to their non-contact probing, optical sensors are well suited for high-precision 2-D and 3-D measurements of micro features. A large number of measurement points can be captured quickly and easily.
The application-specific resolution can be adjusted easily by selecting an appropriate magnification. Due to their short measurement times, optical sensors are used in manufacturing inspection for a range of workpieces. Typical areas of use include punched and formed parts, micro gears, precision optical components, electronic components, dental implants, cutting edge rounding on tools and valve seats in the automotive field.
With surface topography sensors, such as the Werth 3D-Patch or the Werth NFP Nano Focus Probe, the quality of a workpiece can be assessed quickly in conjunction with 3-D CAD data.
If the area to be measured is greater than the field of vision of the sensor, then several measurement point clouds can be arrayed and processed into a single overall surface. However, since each sensor can be positioned anywhere in the measurement volume using the workpiece coordinate system, parts do not need to be completely digitized. Instead, multiple areas of interest can be measured individually.
This methodology saves measurement time and provides previously unachievable precision due to the integration of the sensor in a coordinate measuring machine. The use of less precise stitching methods, which work only with suitable object structures, is not necessary.
For diffusely reflective surfaces and mirror-finish workpieces, Werth Messtechnik provides with the focus-variation method Werth 3D-Patch, and the confocal sensor Nano Focus Probe (NFP), 3-D sensors designed for probing uncertainties of less than 0.1 µm.
For more information contact:
Werth, Inc.
8 Custom Dr.
Old Saybrook, CT 06475
860-399-2445
info@werthinc.com
www.werthinc.com