Benchmark Carbide has invested in automation, software and on-machine laser checking to maintain quality while operating unattended seven days a week. The company primarily makes end mills, up to 1.5" diameter, often at the rate of 50,000 pieces a month.

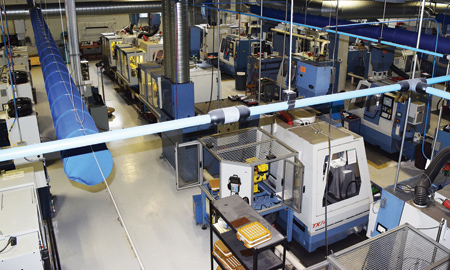
Benchmark owner Paul St. Louis has invested in 30 ANCA CNC tool and cutter grinders with automatic loaders. "We run our ANCAs 24/7, producing primarily end mills, with a number of our own design tools for the aerospace industry," he said.

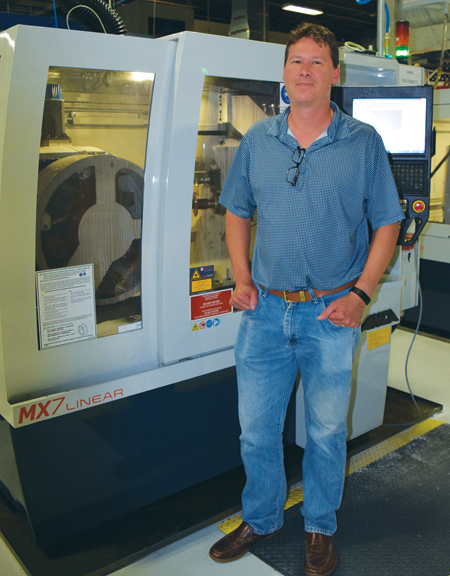
"Size is the one thing you worry about first with end mills, but with the LaserPlus, Benchmark can confidently stay within .001 - .0006 inch. The LaserPlus has allowed us to reduce the need for manual inspection on outside diameters," said Benchmark owner Paul St. Louis.

Ryan Morin, Director of Technical Sales, Benchmark
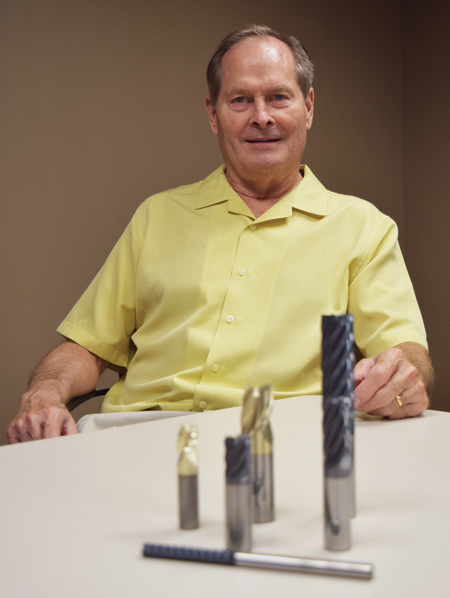
"We have a very strong brand name and we have been making excellent tools since 1996," said Benchmark Carbide owner Paul St. Louis. Since 2001, the has company improved its performance and received good marks for its patented end mills, resulting in dramatically increased demand from its customers.
To keep up with that kind of demand, St. Louis over the years has invested in 30 ANCA CNC tool and cutter grinders with automatic loaders. "We run our ANCAs 24 hours a day, seven days a week, producing primarily end mills," he said. Aerospace is a key customer industry.
The company's success motivated a move into a larger facility. Benchmark has all ANCAs, including eight TX7s, and recently added five MX7 Linear tool grinders with part load/unload automation.
With its large volumes and demanding customers, Benchmark has invested in automation, software and recently on-machine laser checking to maintain quality while operating unattended seven days a week.
Innovative End Mill Line
The company primarily makes end mills, up to 1.5" diameter, often at the rate of 50,000 pieces a month.
"Our customers see us as innovators," said St. Louis. "We make end mills for machining aluminum a little differently than others, and they work exceptionally well."
"Most tools by other manufacturers are made with a cylindrical margin, where the shank is the same as the O.D. of the tool that is cutting," continued St. Louis. "End mill makers typically flute the tool and leave behind a narrow-often .003 wide-circular margin. This is often difficult to hold. If it is too wide, it will push away; too narrow, you get chatter."
Benchmark makes 2-, 3- and 5-flute carbide tools for high-speed machining of aluminum. Variable helix mills are a Benchmark specialty, starting with a 45° helix and ending at a 60° helix. The helix design reduces vibration in the tool.
"Now we have a whole series of tools for tougher materials and finishes-as used in the aircraft industry-designed to achieve a higher metal removal rate. The aerospace companies continually improve toolpaths to reduce cycle times, so we have to produce tools that can keep up with that," said St. Louis.
Additionally, the ANCA's linear drives in the X and Y axes on the Linear machines have been a benefit in the maintenance area. "We like that the ball screw is no longer a wear part in X and Y axes," said St. Louis.
Automated Inspection Supports Lights-Out Machining
Each new machine is delivered with autoloaders-and seven of them with on-board laser compensation, the ANCA LaserPlus. The company is also considering adding LaserPlus to some of its older machines. The benefit is consistency and repeatability. "Because we are a catalog supplier, we need to make sure each tool design is reproduced to exactly the same specs every time," St. Louis said. "Size is the one thing you worry about first with end mills, but with the laser we can confidently stay within .001 - .0006 inch. The LaserPlus has allowed us to reduce the need for manual inspection on outside diameters.
"On the larger diameter end mills, it makes a large difference. We view it as an insurance policy that the parts of the tool affected by the wheel wearing are monitored during unmanned operation and that the machine can compensate if the tool size changes. This gives operators peace of mind to work with more than one machine.
"The LaserPlus helps us assure the high level of quality necessary to succeed as a tool supplier. The LaserPlus is worth it to us. It is like an inspector spot-checking each tool."
The ANCA laser measuring system provides repeatable measurement to 0.0001" and automatic machine compensation while reducing scrap during production of precision cutting tools. It assures grinding process stability.
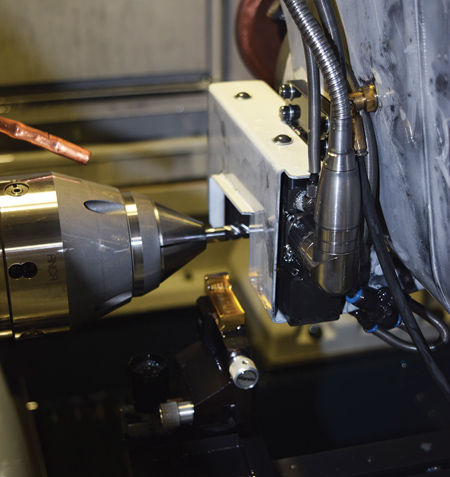
LaserPlus, an enhancement to the touch probe on ANCA's MX and TX grinding machines, uses a non-contact laser beam to accurately measure tool features in just seconds. The LaserPlus system can measure outside diameter, ball nose, corner radius and profile tools.
The laser is mounted inside the machine and does not interfere with the grinding processes while automatically measuring tools in the machine collet. LaserPlus can also reduce the need for off-line external measurement equipment, saving on cost.
The measurement process is fully automated, including compensation for any out of tolerance conditions, thus supporting unmanned machine operation-a capability that supports Benchmark's manufacturing strategy. The LaserPlus system can measure and maintain an accuracy to +/- 0.002 mm (0.0001") over a large batch of tools, measuring the top and bottom of the tool and checking tool runout.
To measure and control the O.D. of a cutting tool, a critical dimension, ANCA has interfaced the laser measurement with Statistical Process Control (SPC) software to monitor and control the O.D. For example, the LaserPlus and SPC can successfully control the size of the diameter on a 6 mm tool over a batch of 50 tools. A Cpk of 1.82 on a tolerance of +/- 0.005 mm (0.0002") was achieved.
The LaserPlus system includes two solutions to reduce the coolant film from interfering with the laser light: spinning the tool at specified intervals and different rotational speeds, and using a compact air blast unit that aims a jet of air to disperse any residual oil from the tool. These two actions ensure the tool is free of any dirt or contaminates.
St. Louis summarized, "Our product has advanced over the years with subtle changes and tightened tolerances, for example, from .005 inch on a corner radius to .002 inch. Inspection equipment such as LaserPlus has allowed us to keep up with this. The customer expects more from us in terms of tolerances and we have to deliver. The better job we do, the more business we can get."
For more information contact:
Benchmark Carbide Corp.
616 Dwight Street
Springfield, MA 01104
800-523-8570
sales@benchmarkcarbide.com
www.benchmarkcarbide.com
ANCA Inc.
31129 Century Drive
Wixom, MI 48393
248-926-4466
usainfo@anca.com
www.anca.com