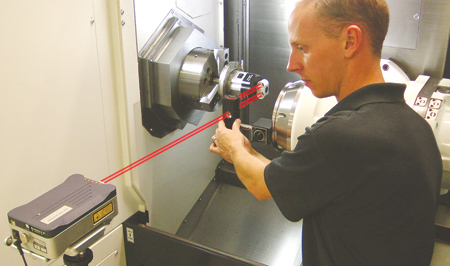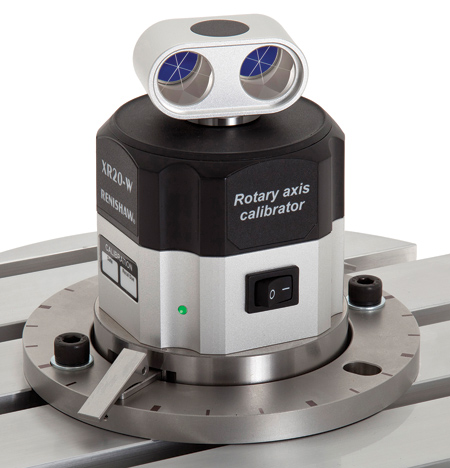
The tripod-mounted laser is aligned with an angular interferometer from the machine spindle housing and an integrated angular reflector. The true angular position of the axis is calculated through a combination of the rotational position recorded by the XR20's internal encoder and measurements from the laser and the angular optic mounted on the XR20-W. Driving the rotary axis to a series of points produces data used to determine a machine's overall axis accuracy. Completed data can be saved for later analysis and reporting.


The Renishaw XR20-W calibration system measures the angular position of rotary axes to within ±1 arc second, wirelessly, for testing the accuracy of lathes, multi-axis machine tools, mill-turn machines, trunnion tables and spindles. The XR20-W works in conjunction with XL-80 or ML10 laser interferometers, as the system combines the readings of the rotary calibrator and laser to determine positioning errors in axes under test.
"The rotary axis calibrator is generating positive feedback from the field with its advanced, compact design, allowing easier set-up and use," said a company spokesperson. Application flexibility is extended by the addition of new off-axis rotary software that allows the XR20-W to be used even when it cannot be positioned directly on the rotary axis under test. The software calculates true position and records axis performance and errors when compared to the intended target. The test takes about 10 minutes and results are sent to a PC via Bluetooth connection.
"The new Renishaw XR20-W rotary axis calibrator has transformed the way we calibrate rotary axes on machine tools," said Tony Morley, President, Morley Machine Tool Alignment, a service and maintenance provider in Milton, WA. "Before XR20-W, our technicians relied on the old Renishaw RX10 and our in-house designed Morleyometer for applications where the calibrator could not be mounted on the center of rotation. While these devices got the job done, they were heavy, cumbersome and slow. Set-up could be challenging, and the associated cables and fixturing meant that great care had to be taken to ensure the test proceeded smoothly."
"The XR20-W can even be used in off center applications such as trunnions and head type 5-axis machines," added Morley. "The new methodology allows mechanical set-ups to be done quickly with just a simple generic mounting fixture, allowing a fully automatic test routine to proceed without delay. This tool has enabled us to offer our customers a high standard of service and helped our company grow."
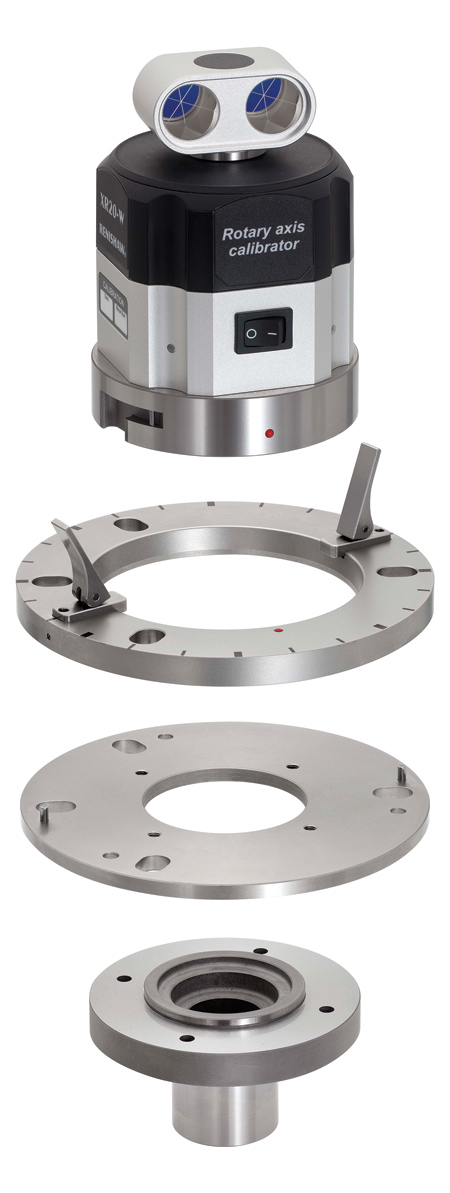
The XR20-W's light weight (just over 2 lbs.) and wireless operation allows fast set-up and eliminates safety hazards created by cables. It attaches to a rotary axis via a flexible mounting ring assembly, and is centered within ±1 mm (0.04") using a visual aid. Flexible mounting options include an adapter plate for rotary tables with unsuitable center recesses and a chuck adapter for lathes. The various mounting options ensure faster set-up and minimize alignment errors that can lead to measurement errors.
"We have reduced our test set-up time by 40% and test run time by 20%," said Luke Wang, Assistant General Manager of Quality Control Department for Hurco, Taiwan. "And, the bluetooth wireless technology allows safer testing, making supervision a non issue. As a result, we do not disrupt shop floor activity."
For more information contact:
Renishaw, Inc.
5277 Trillium Blvd.
Hoffman Estates, IL 60192
847.286.9953
usa@renishaw.com
www.renishaw.com