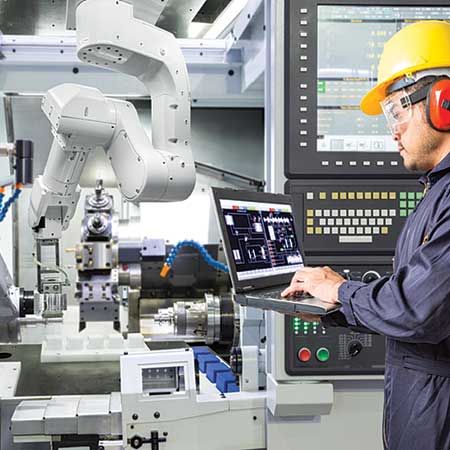
Quality inspection system removing subjective interpretations through a physics-based approach to quality testing.
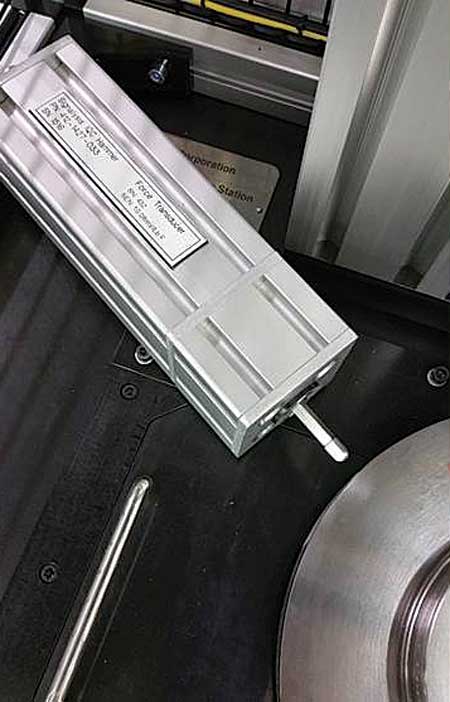
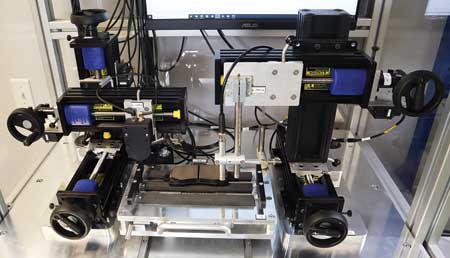
A hammer inflicts force on a brake rotor. Measurements are performed on the vibration to pinpoint cracks, manufacturing flaws and other anomalies.
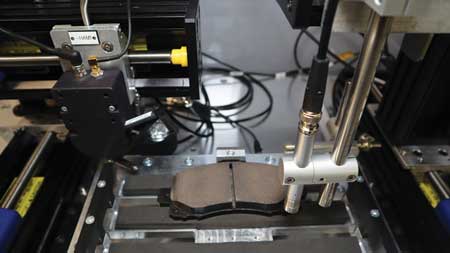
A quality inspection test system being used to verify that brake pads meet quality and customer specifications prior to leaving the manufacturing floor. (Image courtesy of Signalysis)
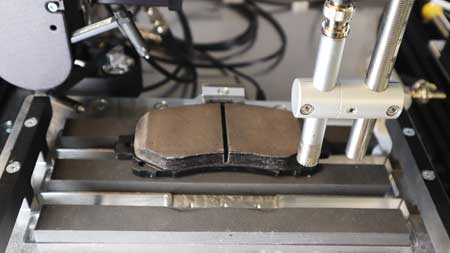
What do the space program and a quiet running car ventilation fan have in common? Plenty: the same physics, research and guiding principles that launch rockets into space are now ensuring the quality of manufactured parts.
While beauty may be in the eyes of the beholder, quality, on the other hand, must be nonnegotiable. With market share, reputations and contracts hanging in the balance, there is no room for interpretive subjectivity of what is or is not acceptable. It is therefore critical that manufacturers ensure that their parts/products meet specific quality metrics, tolerances and specifications before reaching the customer.
Fortunately, quality inspection test systems are allowing them to do just this.
Quality Inspection
At one time, manufacturers relied solely on the eyes and ears of inspectors to physically evaluate parts coming off the line. Because the process was wide open to interpretation, high scrap rates, customer complaints and excessive warranty claims often followed.
Quality inspection effectiveness improved exponentially with the introduction of technology in the form of objective, physics-based test systems. While they run the full gambit in terms of automation and sophistication, many are rooted in the core principles derived from rocket-era research.
Actually, it is Rocket Science
Post-World War II saw rocket science take on an unequalled sense of urgency as countries raced to develop and refine the technology. Mounting tension between the United States and the Soviet Union was very real, and defense was critical. However, newly developed rocket motors were blowing up on the test stand, putting the program in jeopardy. With excessive vibration levels identified as the culprit, scientists and engineers knew that success would ultimately hinge on the ability to lessen the impact of these disruptive forces.
At the center of this research for the U.S. Navy rocket program (and later the NASA space shuttle), Robert Coleman would go on to lend his expertise to adapting aerospace vibration technology and methodology to help manufacturers identify quality defects before they reach the customer.
"Whether you are talking about the Polaris rocket, space shuttle or an automobile seat motor, vibration issues are no less important to automotive suppliers as they are to engineers at NASA," said Coleman, President, Signalysis. "Think about all the components, assemblies and sub-assemblies that are monitored on the shuttle. With 500 to 1,000 measurements needed to generate a vibration analysis, this is a complicated and lengthy task. On the other hand, while we at NASA had weeks to analyze and make decisions, the PASS/FAIL window for end of production inspection systems is just a few seconds. Today, we are leveraging space shuttle testing technology to overcome assembly line constraints and cycle time restrictions. Allowing vibration deformation patterns to be developed in just seconds enables a much more thorough analysis."
Large Scale Quality Inspection
For manufacturers and job shops that produce a low volume of diverse parts, a simple approach consisting of visual inspection and some basic measurements is often sufficient. On the other hand, larger manufacturers, such as OEMs, Tier 1 and Tier 2 suppliers and any serving the aerospace and medical industries require a more sophisticated process.
Because consumers tend to form an opinion of a product based on the complete system, a rattling window, unreliable ventilation fan or noisy seat motor in an automobile, for example, will result in a reputation of poor quality for that vehicle make, model or manufacturer. Consequently, OEMs are increasingly vigilant with respect to supplier quality.
Removing subjective interpretation from the quality equation is critical. Requirements might call for the part or subsystem to satisfy specific design and performance parameters and be free of objectionable noises. But what is objectionable-and at what level does a noise, shake or rattle reach that point? Leaving quality open to interpretation is a slippery slope, since what is unacceptable one day might be accepted the next.
The answer lies in objective physics-based inspection. In this way, suppliers ensure that the parts that leave the manufacturing floor consistently meet and exceed customer expectations in terms of tight specifications and quality standards.
How it Works
Throughout large-scale manufacturing, there is no time for detailed laboratory quality testing. As a result, companies generally rely on automation and a fast (yet highly reliable) PASS/FAIL process.
Parts coming off the line are placed into the test stand, either by hand or machine. The system performs its checks and parts containing flaws are flagged. But exactly what happens during this time and how is quality defined, measured and verified?
Ensuring that each system meets the unique requirements of each manufacturer requires a thorough, highly technical and systematic approach.
"The process begins by gathering customer specifications," explained Coleman. "This could be anything from specific failure modes-such as ticking in a motor, excessive noise or rattling, modal parameters for rotors or an OEM's general dB specification to the nondescript `other objectionable noises' catch-all."
Coleman's team takes subjective, often vague, input from the customer to create objective, quantifiable metrics.
"We begin with subjective jury evaluations to determine a rating of specific noises," said Coleman. "From the results, we can use statistical methods to choose what psychoacoustics can best be used to describe how the human ear perceives sounds of the specific source. From there, statistical methods are used to create an algorithm to correlate to the rating system of the human ear subjective ratings."
Quality Test Systems
Quality inspection systems consist of measurement hardware, such as data acquisition devices (such as sensors) along with sophisticated software. The proper setting of measurement parameters determines whether a part passes inspection. The sequence of actions is implemented with drags, drops and line connections to specify the order. A database of acceptance tests with complete description of products, test set-ups and PASS/FAIL specifications is available for automatic access.
In many instances, as a product arrives to the test station, a bar code scanner or keyboard entry provides the information needed for automatic selection and initiation of the acceptance test. Upon test completion, the unit automatically receives a PASS/FAIL quality grade.
The Driving Force: Software
Driving all of this is advanced quality control software. The software employs sophisticated algorithms and data analytics to provide real-time monitoring, inspection and analysis of products, ensuring that they meet stringent quality standards and specifications. The software is designed to handle complex data inputs from multiple sources, including sensors, machines and other production line equipment. Critical data is captured and analyzed to identify any deviations from the desired quality benchmarks. This ability to process large volumes of data quickly and accurately helps in detecting defects, inconsistencies and potential issues.
Highly customizable, the software is tailored to specific specifications, requirements and production environments. It supports a wide range of testing and inspection methods, including acoustic, vibration and torque analysis, making it versatile for use in sectors such as automotive, aerospace, consumer electronics and more.
Example: Frequency Response Function
Because we live in a physical world, there are a number of forces at play with regard to manufactured parts. The material type, thickness, design and usage application are all contributing factors when determining if a part/product passes inspection. For example, a chipped edge is acceptable for a construction beam but will fail in an aerospace or medical application.
Much like human inspection, test systems rely on visual, audio and sensation means to determine acceptable levels of quality-only with exponentially more accuracy and consistency. For example, a laser can detect miniscule defects unseen by the sharpest human eye. Similarly, microphones and vibrometers can detect subtle audible pitch changes that indicate cracks or flaws. A test station for measuring brake rotors, for example, might include an automatic hammer to impact the rotor, a force response proportional to the force level and frequency. The response is measured and, using Fourier Transforms and complex mathematics, a Frequency Response Function (FRF) is calculated.
The FRF provides a quantitative measure of how a system responds to input forces over a desired frequency range. In this case, the hammer strike. Mathematically, the FRF is represented as a ratio of the system's response over input force(s) in the frequency domain. It is often expressed as a complex function, incorporating magnitude and phase information. The magnitude of the FRF indicates the amplification or attenuation of the input signal at a specific frequency, while the phase reveals the time shift between the input and output waveforms.
FRF is a powerful tool that provides valuable insights into the dynamic behavior of a part. It quickly determines if a flaw exists and if that defect is inside the acceptable quality range.
The Quality War
While subjectivity clearly has its place in the world, quality must be measured clearly, accurately and consistently. Research and vibrational analysis that helped to win the space race is also helping to win the war on quality.
Integrating the proven principles of physics and advanced data analytics with user-friendly tools allows manufacturers to maintain high-quality standards, reduce costs and improve customer satisfaction.
"The human brain uses the six senses to identify when something is not right. Our job is to develop the right metric to detect issues and protect customers from complaints," said Coleman. "We use as many sensors as required to emulate the human brain and catch parts that are not right as they come off a manufacturing line."
Authored by Robert Farrell, President, Farrell MarCom, LLC
For more information contact:
Neil Coleman
Signalysis, Inc.
539 Glenrose Lane
Cincinnati, OH 45244
513-528-6164
sales@signalysis.com
www.signalysis.com